Link your personal email account to HubSpot in order to send individual emails from the CRM, track email responses within the CRM, send email sequences, and enable HubSpot Sales to utilize sales tools directly in your inbox.
Your email account should be unique to you as a user and should not be shared with anyone else on your team. It should be the email address you typically use to communicate with your contacts, such as your company email address. When you connect your personal email account, you are granting HubSpot permission to send emails to your contacts using your company's email servers. Certain HubSpot tools require a personal email connection, and you have the option to connect multiple personal emails to HubSpot for sending purposes.
A team email address allows multiple users to access and communicate with customers. By connecting a team email address to the conversations inbox in HubSpot, your team can efficiently view, manage, and respond to emails all in one place. Learn how to set up a team email address in HubSpot or refer to the guide on various inbox connections within the platform.
Before you get started
Below find definitions for terms relevant to the email connection process.
| Term | Definition |
| Email account/address | The email address that you use to log in to your email client and send emails to your contacts, such as your company email address (your.name@hubspot.com). |
| Email client | The application that you use to access your emails. In some cases, your email client can be the same as your email provider (i.e., Gmail is an email provider and an email client). |
| Email provider | The service, such as Gmail or Office 365, that lets you send and receive emails. |
Please note: While HubSpot does not directly support a connection with ActiveSync, if you utilize ActiveSync in your email client, you can still connect your account by using the HubSpot-Exchange connection option..
Connect your email
To link your personal email, navigate to your account settings. Users must have permission for Personal email access to connect their email account.
- In your HubSpot account, click the settings settings icon in the top navigation bar.
- In the left sidebar menu, navigate to General.
- Click the Email tab.
- Click Connect personal email.

- In the dialog box, select the Turn on inbox automation checkbox if you want to turn on inbox automation features when you connect
- Click Connect your inbox.
- In the text field, enter your email address.
-
HubSpot will suggest the best email provider for you to connect with. Simply click on "Connect to [recommended provider]" and follow the subsequent steps tailored to your specific provider to successfully connect your personal email.

- If HubSpot is unable to automatically detect your email provider, simply choose an option from the list provided and follow the subsequent steps tailored to your specific provider to successfully connect your personal email.

Gmail
Please note: if you connect a Gmail inbox that has an alias set up, that alias will show up automatically in the From dropdown menu in the email composer. The alias must be set up in your Gmail account before you connect your inbox.
If you have Google's Advanced Protection Program enabled in your Gmail account, you can't connect your inbox to HubSpot.
- Review the information provided before proceeding with connecting your Gmail inbox to HubSpot, then click on the Continue button.
- You will be asked to log in to your Gmail account. Enter the email address associated with the Google account you wish to use. If you are already logged in to multiple Gmail accounts, select the specific account you want to connect.
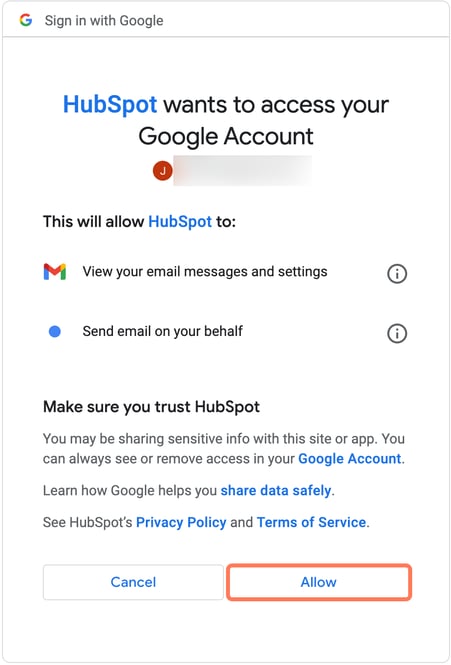
- Review the required permissions, then click Allow.
- Upon successful connection, you will be directed back to your settings, where a notification will confirm that your Gmail inbox is now linked with HubSpot.
Necessary disclosure:
By integrating your Gmail account with HubSpot, you are giving HubSpot access to various details linked to your account, including contacts, emails, calendar events, distribution lists, subject lines, and tracked link URLs if you enable email tracking. HubSpot can also read, modify, create, and send emails from your connected Gmail account. Additionally, HubSpot scans your email content to identify tracked emails for the notifications feature, storing information like replies, outgoing mail, email headers, subject lines, distribution lists, aliases, timestamps, and email bodies. Keep in mind that the emails you track may be visible to other users in your HubSpot account.
If you choose to connect your Gmail account via IMAP (or Generic Inbox Connection), HubSpot will only have access to your email address, password, server information, email metadata, and message bodies. This method of connection does not require linking any additional G Suite applications.
Microsoft Outlook
Please note: you cannot connect Office 365 shared mailboxes to HubSpot. Office 365 GCC High and DOD environments are also not supported by HubSpot.
- Review the information provided to understand the process of connecting your Office 365 inbox to HubSpot, then proceed by clicking the Continue button..
- You will be asked to log in to your Office 365 account. Simply enter the email address associated with the Office 365 account you wish to connect. If you are already logged in to multiple email accounts, select the specific account you want to link.
- Upon successful completion of the connection process, you will be directed back to your settings. A dialog box will confirm that your Office 365 inbox is now successfully linked with HubSpot.
Necessary disclosure: When utilizing the Outlook email integration with HubSpot, HubSpot will have access to various information linked to your account, including contacts, emails, calendar events, distribution lists, subject lines, and URLs of tracked links from your emails if you opt for email tracking. HubSpot will scan your email content to determine which emails you choose to track, enabling the notifications feature. Additionally, HubSpot will save replies, outgoing emails, email headers, subject lines, distribution lists, aliases, timestamps, and email content. Any correspondences you track will be visible to other users within your HubSpot account.
Microsoft Exchange
Please note: Microsoft is deprecating Basic Authentication for Exchange Online in October 2022 and requiring Modern Authentication. HubSpot's Exchange integration uses Basic Authentication but is designed for Exchange On-Premises instances, which are not affected by this change and will continue to function with Basic Authentication after October. If you are an Exchange Online user, you can connect to HubSpot's Outlook integration instead. It is compatible with cloud-hosted Exchange and uses OAuth, a form of Modern Authentication. You can reconnect your inbox using the Outlook integration at any time.
Before connecting your Exchange inbox, confirm with your IT team that your Exchange server is running Exchange 2010 SP2 and above.
To connect your Exchange inbox, you will need to provide your Exchange email address and password. Additionally, depending on your Exchange server's setup, HubSpot may request further details for the connection process. Check the table below before proceeding to ensure you have all the necessary information ready for a seamless connection.
| Information(*required) | Example values |
| Email address* | jdoe@hubspot.com |
| Password* | HubSpot123 |
| Username | jdoe |
| Exchange URL | https://email.hubspot.com/ews/exchange.asmx |
| Exchange version | Exchange 2010 SP2 and above |
Please note:
- If your email inbox uses two-factor authentication, you'll need to enter a third-party app password. Review documentation from Microsoft to learn how to generate a third-party app password.
- If you're using Exchange Online, connect your inbox to HubSpot with modern authentication using the Outlook integration.
- Read through what to expect when you connect your inbox to HubSpot, then click Continue.
- In the dialog box, enter the following information:
- Email address: your exchange email address.
- Password: your Exchange password.

- If you prefer, you can also choose to reveal additional fields by clicking on Show optional fields. By default, HubSpot will try to automatically detect your Exchange URL using Autodiscover, a feature that looks for the URL based on your domain's DNS settings. In case Autodiscover doesn't work, you will need to manually input your Exchange username and URL for a successful connection.
- Username: enter your username. Typically, this is what is listed before the @ symbol in the email address, or your user ID.
- Exchange URL: enter the URL used to access your Exchange server.

Please note: If you are unsure of the Exchange URL for your Exchange server, it is likely formatted as https://mail.domain.com/ews/exchange.asmx. To find the correct URL, log into your Exchange mailbox from a web browser, then copy and paste the URL into the Exchange URL field. HubSpot will automatically detect and recommend the accurate Exchange URL for you.
- Click Connect inbox.
- Once the verification process is complete, a confirmation dialog box will appear, notifying you that your Exchange inbox is successfully linked with HubSpot.
Necessary disclosure: When you connect your email account through Exchange, HubSpot gains access to your email address, password, server details, email metadata, and message content. This access allows HubSpot to also retrieve additional information linked to your account, including calendar events, contacts, and distribution groups.
Other mail provider (IMAP)
Before connecting your inbox via IMAP, review the technical requirements with your IT team. You must meet all of the technical requirements before you can connect.
Please note: If you want to link an email account to the conversations inbox feature, you must connect an inbox hosted with either Gmail or Office 365. Please note that the Conversations feature does not currently support connections via IMAP.
HubSpot does not support Amazon SES and Amazon WorkMail. If you encounter problems with your current email provider and are using either Amazon SES or Amazon WorkMail, HubSpot suggests transitioning to Gmail or Office 365 for a smoother email hosting experience.
To connect your inbox using IMAP:
- Read through what to expect when you connect your inbox to HubSpot, then click Continue.
- Next, enter the Email address and Password used to log into your email account. In many instances, HubSpot can automatically detect your server's IMAP and SMTP settings once you enter your email address and password. Alternatively, if an admin in your account has already set up your domain's IMAP settings, your IMAP and SMTP server details will populate automatically.
Please note: if your email inbox uses two-factor authentication, you'll need to enter a third-party app password. Review documentation from your email provider (e.g., Yahoo Mail or iCloud) for instructions on how to generate a third-party app password.
- If HubSpot does not detect your server's IMAP and SMTP settings, click to expand the Advanced Options.
- If your outgoing mail (SMTP) does not use the same credentials as incoming mail (IMAP), clear the Outgoing mail uses the same credentials as incoming checkbox, then enter credentials for both outgoing and incoming mail servers.
- Otherwise, enter your server's username, IMAP server and port, and SMTP server and port in the corresponding fields.
- You can also select the checkbox beside Trust any certificate if necessary. Learn how to find this server information in your email client.

- Click Connect inbox.
- Your connection will be verified and completed, and a dialog box will appear to inform you that your inbox is now connected to HubSpot.
Necessary disclosure: When you link your email account through IMAP (or Generic Inbox Connection), HubSpot will only have access to your email address, password, server details, email metadata, and message content. Furthermore, connecting your Outlook account via IMAP does not necessitate linking any other Microsoft applications.
.png?width=688&height=229&name=Knowledge%20Base%20Contact%20Us%20CTA%20(4).png)